Monday, October 08, 2012

Being Lazy for the Greater Good

But... working on customs is hard! It takes skill, time, dedication, knowledge, and motivation. That said folks, don't make TOO much work for yourself. Know your limits, but also use your knowledge to help you suceed and save time.

For example (and excuse the tangent), I recently started this custom, a Gisel/GG Valentine to what originally I had planned to be a Park Saddlebred Stallion.

Initial moves with a long road ahead.


Thankfully, I had some great folks come forward and educate me about the Saddleseat riding style in general. Not all Saddleseat is Park. Park is the "highest" form of Saddleseat, in that they are the most dynamic, energetic, high-stepping, eye-rolling, tails-on-fire type of Saddle horses.

This would have been too much work to make the model be this way. Technically, I was not sacrificng my original vision, because I realized I didn't want this custom to be that lively. I did, however want a high stepping Saddleseat mount, but honestly, the Show or Country Pleasure was more the speed I was looking for.

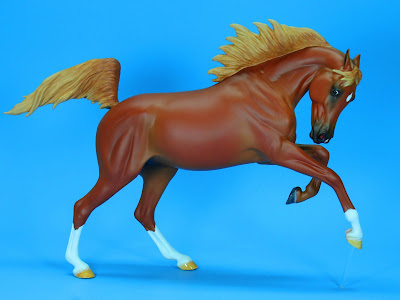
Notice Silks' legs, this is about as high as they get at the trot unless he's REALLY excited.


Memories Silk here is a good example of a Saddlebred who is naturally suited and trained for Show Pleasure. The knees and forearms on a Country or Show pleasure horse usually never go above horizontal (or if they do it's very minimal), with Country tending to be slightly below the horizontal. He doesn't quite have the insane knees-bumping-chin action that the Park horses have, but still has plenty of action that, with the aid of his shoes, gets him to somewhere between Country and Show Pleasure. With proper training and conditioning, he could (and has been) a solid Show Pleasure entry.

I like this style best, the horses tend to be more my kind of personality, not as hot, still very beautiful with lots of yummy action that doesn't go into the extreme.

This leads me to my second dilemma: I had intended this Gisel to be a Saddlebred. As I looked at her, I felt that her body type, especially the thickness of her legs, did not match a true Saddlebred. Granted, there are some Saddlebreds with good bone, but the general instant image one usually has in their head is that of a long and lean yet strong, elegant, spindlely-legged, high stepping, swan-necked locomotive that just won't quit. Gisel had too much of a "family" vibe (which makes sense as she's sculpted after a broodmare) and her legs were just a tad too thick than I felt comfortable for a Saddlebred.

After yet another person's suggesstion, it made sense to me: A Morgan. They are strong, robust horses in comparison, with good bone. They are often used in Saddleseat riding (as they are very proud, flashy, and stylish horses). They are, however, a lot more short-coupled than a Saddlbred or Gisel, so some different alterations would need to be made but we'll get to that later.

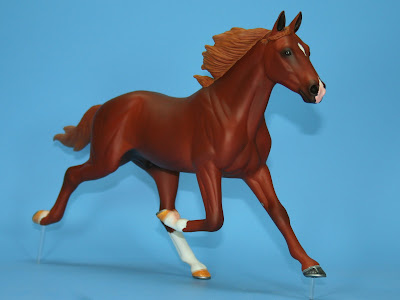
"Sneaky" (On Second Thought) isn't the best example of a Morgan, but he has the basics down :)


The main concern against making Gisel a Saddlebred was the thickness of her legs. While one could "shave down" the legs on a custom, this is a LOT of work. I'd have to reduce from all sides, not lose leg detail, or worse, have to resculpt it back in. It's a lot easier if you don't have to change a horse's basic leg shape at all. Moving a leg is one thing, even adding detail or cleaning up mold or sculpting flaws can be done fairly simply, but trying to add or take away thickness is a pain, and I think, beyond my comfort level and skill.

So with breed and pose finally decided, it was time to attack with the new game plan in place. I don't suggest constantly changing your original plan (it's gotta get done at some point!) but if something lends itself to a better or more convenient idea that is still pretty awesome, I say go with the flow and do whatever your artist's heart is telling you to do. Learning along the way is just the icing on the cake.

Remember how I said Gisel's back is too short? Well, let me just say the process of lengthening or shortening a back is somewhat inconvenient. First you have to chop the back in half, usually in the middle. Then you have to either take off 1/4 inch or whatever extra you don't need, or stuff the crack with epoxy AND make sure it's even. Sealing up the old cuts is the worse part, you need to make sure the epoxy goes over the whole thing without leaving a bulge or letting tiny cracks show through. Shaping the back and barrel so it matches, praying it doesn't all just fall apart (because the whole process compromises the structure of the model), smoothing it all... it's just a huge pain.


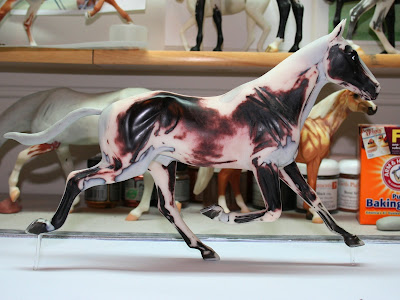
Not to mention it's creepy as hell *insert mad scientist laugh here*


So, this is where all that "Form-To-Function" knowledge you have about real horses comes into play. Not only was Gisel's back too long, his shoulder was too straight. That is, the angle from withers to point of shoulder was too steep and needed to be laid back more. In real horses, you can't fix this, it's just how the horse is made by how their spine (withers placement) and scapula (shoulder angle) is all put together. The longer slope or more laid back a shoulder is on a horse, the easier it is for them to bring their shoulder forward and up. It's also great for a smoother ride.

Thankfully, in my case, he had both of these problems. By cutting behind her shoulders, up over her back, just behind the withers, I was able to "lay her shoulder back," thus shortening his back and bringing his legs up higher. Two birds, one stone, hee!


Before:
 After


See how regal he looks now? And more adhering to Morgan breed standard as well. That made him exactly what he needed to be with really very minimal effort. At this point, I had done nothing to his neck except slightly heat it so it's striaght (very slow n' steady process) and it just so happen to be in the position/angle it needs to be. Perhaps that why I felt Gisel would work so well for this project. Not having to create an entire new neck is helpful to say the least.

Now I'll get back on topic: that "slow n' steady" thing works wonders! I use to be one of those that would burn it up, scorching the plastic, air bubbles poping up everywhere, saying I'll just fix it later. Well, when later comes, you're cursing yourself for making so much work to do later. Sanding, filling, smoothing, all can be avoided if you make minimal cuts and scorching if you can avoid it. Or else you get stuff like this:


That horse has 99 problems and it's all in that leg.


This guy STILL isn't done. Mostly because I don't want to fix all the newb "work." I do plan on finishing him, but the desire is not strong and I must count him lucky: some stuff that looks similar or worse than him have since been sold, traded, given, or thrown away. Don't stifle your own creativity later and make your own artist block. Make sure you are patient and practice so you have the skill to be able to move a leg without cutting a damn thing if it's posisble. Such as this guy..


Can you believe I did not make one single cut on that front outstretched leg? (it's a Bluegrass Bandit/Bear, so that leg was tucked before) I got lucky I think, but I'm begining to wonder if I should apply at Peter Stone as one of their Factory CMers.

Now this is not a place for me to brag or anything, it's where I can tell you how to do this. the "Slow N' Steady" heating method is a good one. You don't need the 1000 degree Paint Stripper to move a horse (although I totally had one when I first started and used it in just the evil way you are thinking), I prefer an Embossing tool, found in the scrapbook section of your crafts section. It's a smaller, more controlled heat flow (can "pinpoint" heat a surface the size of a fingernail rather than a silver dollar pancake, so it's good for Stablemates too), it can get hot enough to scorch but only if you don't keep moving. It's original use is to sort of "iron" paper into raised shapes and designs (or, emboss).


Yes, it's glittery... and yes, that little guy should be scared.


No matter what you use, keep your heat source moving evenly at least 3-5 inches away from your model, and remember to heat the other side of whatever your heating to prevent wrinkling. For example if you're trying to unbend a knee, spend most of your heating time on the underside of the knee, but keep the front/top of the knee warm too so it can squish with the move when you add pressure, not just wrinkle and fester. Most wrinkles can be gotten out by stop adding pressure and letting the heat blow on the wrinkle for a SHORT time. The plastic should shrink back (as will your move to a degree) You may then continue to slow move and add your pressure again. Keep it even, keep it steady.

If you see bubbles and smoke, remove the heat, let it cool down a bit, and reapproach more slowly. A few bubbles will have to be fixed later and sometimes, can't be helped (the plastic may naturally have trapped air bubbles from the molding process). Sometimes random "stresses" will pop up, they look like like big, flat, popped bubbles. These are completely random and there's no preventing them that I have found. They just react to heat and are either due to a weak spot in the plastic or just an oddly chemically mixed part of the plastic. I have noticed this tends to happen more on the newer Stablemates or on a Traditional's joints sometimes.

All of this just takes time and practice on your models. Not all plastics are created equal. I prefer (and have instructed based upon) the newer Breyer plastic. Breyer has gone through many plastic changes over the years. In the 70's, they experimented with many different kinds of plastics, mostly recycled, as the U.S. went through an oil crisis. This is why some Breyers are "chalky" or painted white first before they were painted because their plastic wasn't white enough... or a different color entirely, like hunter green or bright, neon pink!

Some of these older or aged plastic may not take to heat well. Such as this guy who hails from around the 70's... (the young and squeemish may want to look away)

You have no idea how much this hurts...


I could not work with this plastic. While it is white, it was old, tough, like jerky. Even the smallest amount of heat caused the surface to char and bubble furiously. It wrinkled, no matter what. Only when I scorched the hell out of it was I able to get it to move, and even then I had a very short time frame to do it in because it once again held firm. I ultimately had to find a newer version of the mold.

Heat is a great tool for working with plastic. I use it especially with any cuts I need to make. Cleaner and more precise than just a dremel cutting wheel, you warm the plastic, but not too much, just enough to make the plastic cut like butter under the sharp blade on an X-acto knife. Always use a fresh, sharp blade when you use it to cut warm plastic, prevents dragging and catching. Be careful not to overheat your plastic, or it will simply just stretch away with your blade.

This is definitely a crucial technique for moving heads (escpecially those that I still want attached to their original necks). I did this for the Gisel Morgan as well, cutting just behind the ears and behind the cheek half way, down underneath it and cut out the inside of the jaw (that on a real horse is the soft part between the mandibles). You can also see that I did this around the groin area.


That's all for now, more on customizing adventures later!

Tuesday, August 14, 2012

How to Make an Amazing Custom

Didn't think I'd make such a bold title for this, did ya?

Here's the basics: the creation of a high quality customized model horse starts before it even begins. Research, practice, and vision all have a hand in building a model that will make people go "Wow!" If this sounds like a lot of hard work... it is. It took me 10 years (and probably about 5 years of that was actually practice, all the while researching) until I felt I was "good." Notice I said "good" and not "great." Others may disagree (which I humbly thank), but a point I want to make is that there is *always* room for improvement.


This is an example of some of my earlier work... always room for improvement!


No Artist is perfect. There is always opportunity to grow and learn. never assume you are perfect, or worse, better than fellow artists. Everyone has their strengths and weaknesses. Never allow yourself to get too big of a head, nor should you constantly trash your own work. Every piece you make should just be another important chapter in your own library of experience.

This post will cover the advice I would give if someone was doing a custom that would have repositioning, a breed change, flaw or conformation fixes in an effort to live show or sell to someone with high standards.

Now that I've given the preliminary attitude and mindset, on to the important steps that one should take to create a beautiful custom.

Research and Credibility


This is the most important step of all. Before you even touch a model, be ready to look up everything about your goal breed, gender, position, and color. Research is a constant thing, most artists I know would never turn down a good reference photo of something especially clear, unique, or beautiful.


Cigar has been inspiration for many.


Getting the basics in ABCs (Anatomy, Biomechanics, and Conformation) is super important. I cannot stress this enough. Anytime you move a leg or neck, you are changing the angles and muscles involved in those angles. Learning how it really looks like and effects the whole body on a live horse will be crucial to how you can better "envision" the change on plastic. Reading books is especially handy for this.

This is my list of books that I personally suggest, I have linked them all from Amazon but if you can find them elsewhere, feel free to find the best deal! None of these are required, but they are all VERY handy and are in my personal library.

Anatomy, Biomechanics, and Conformation: this is the foundations of any model and these books come highly reccomended. I reference them often, especially when doing something new.

Breed Books: you really can't have too many of these, and honestly there are many books out there that cover many horse breeds, try and find one that is current.

Color and Genetics: While learning inheiritance is not required, it is helpful for determining if a color or color combination is possible.
  • Horse Color Explained Out of date as far as research on how certain genes work, but wonderful photos and still very handy. Kind of rare and out of print, contacting the author may do you good.
  • Equine Color Genetics, Third Edition Previous editions are worth picking up if you can't spring the cash for this latest edition, they just won't have as much current info on how some genes work)
  • Horses in Living Color Really, this is just a pretty picture book but definitely worth picking up if you can
  • Equine Tapestry: An Introduction to Colors and Patterns A new book by my good friend Lesli Kathman, and it's a fantastic, simple look at a basic overview of color in plain English. She's currently writing books that go more in depth about how color has shaped and been shaped by various breeds throughout their history. Equine Tapestry Volume I is the first of her 4 volume set which concentrates on Draft and Coaching/Carriage breeds (ponies will be next!). Also, I linked it from *her* site so that she receives more of the profits than if it was ordered through Amazon :)

Other Helpful, Fun, or Useful Books

One piece of advice I feel I must stress: study real, live, breathing, moving horses of all shapes and sizes in person at any opportunity you can from all angles. This is a common piece of advice but a damned good one. Being an artist that tries to recreate the real thing, this is the best thing you can do for yourself and your customs. If real horses are not available to you, gather reference photos and videos as much as you can. They aren't quite the same, but sure do help regardless.

Go on regular reference hunts: Google Image Search is your friend. Pick up books about various breeds, check out official breed registry websites, learn a little about equine color genetics. Knowing what each breed is known for, what isn't allowed, and what colors they can be go a long way in the credibility of your custom. If only you could see my files... (something like 20 gigs? *cough*)


Historical reference can also be handy: did you know Lippizans were once appaloosa?


Having a photo of a real horse in the same position, color, etc. is nice, but not required, unless it's a really rare thing. Part of our job is to convince fellow hobbyists that says, "Yes, this happens, here's my proof." A Tobiano Pinto Standardbred Pacer racing? Rare, but it happens. Not everyone can know every single thing about every single breed or discipline. If you want to do something that's truly unique, look it up, make sure it can happen, or else a judge isn't going to believe it.

I could go on and on about research and your own education but really there's no other way but actually going for it. Be open to every breed's standards and disciplines. Try not to let personal preference overrule your learning, even if it comes to questionable or abusive practices. It is popular opinion to avoid sculpting/depicting the truly damning aspects (Big Lick Walking horses, the bulging muscles of the Impressive-bred Quarter Horse, Rolkur in Dressage, etc.) but please do read up on them so you have an informed opinion. Whether you decide to do these is up to you.


What can this picture tell you?


I want to mention one last thing before I move on. The most valuable advice I have ever gotten was from my high school Art teacher, Mrs. Eyster. It was also the most simple: LOOK at your reference. Actually look at the details and try to actually replicate them. For the longest time I used to just take the general idea of a piece, process it through the ol' Cindy-matic Brain Filter, and it came out... similar, but definitely me, not what I was on the reference.

You don't need to get overly anal about it, but try and learn and "listen" to what the reference has to teach you. Did you know when the hind leg is cocked, the hip drops? Or how when the head and neck go down, the whole back/barrel raises up? Did you know you can lock a horse's whole hind leg in place by flexing only its fetlock? Does that red dun actually have leg barring? No? Oh wait, it does, it's just so faint! Oh look, the dapples of this grey are smaller in this area than in that one! That's the sort of thing to look out for.


Picking the Right Mold


Choosing a mold for your idea (or, sometimes in my case, "listening" to what a mold lends itself to be) is a big decision. You can't build a palatial mansion on a swamp. What mold you start with determines the very essence of your custom, determining it's proportions, size, and general feel. Unless you become very advanced and are using a mold strictly as an armature, or you cover it head to toe in epoxy, anywhere from 50% to 95% of that model's surface will be visible. Be happy with what you're starting with.

It's easiest to start with a mold that is similar to what you want the final result to be. Using a Thoroughbred to be a Quarter Horse may take some effort, but far easier than if you started with Draft horse.... ok, that's too obvious. Though I have seen a Thoroughbred be turned into a Belgian... but that is a true case of using a model as an armature.


Oh, the changes you will do...


The most popular or new molds don't necessarily mean they are correct. A lot of them are in that Breyer and Peter Stone are striving for competitive horses in their Original Finish form, but even they have flaws on almost every piece released. It is up to us as the customizing artist to fix these flaws so that they are competitive in the more demanding Custom division.

There are many ways people feel they can select these "more correct" molds. Some feel that certain sculpting artists are better than others. Some have certain attachments to a certain mold. Just because a mold is older doesn't mean it's not good enough to customize.


Ok... maybe some aren't...


As far as plastics go, I personally love the old Maureen Love Classics. I also like Sue Sifton, Sarah Rose, Brigitte Eberl, Kitty Cantrell, and some of Sommer Prosser's work and the latest generation of Stablemates. These, however, are *my* preferences. I like them because they are generally correct in their ABCs and some have a very fleshy, life-like style to them. ALL of them have their flaws that the artists tend to do every time, however. No piece is without flaw, and even after "fixing" them yourself.

As cut-throat as it sounds, some models just show or are better received than others. Sure, you could customize a Family Arabian Mare... but the Proud Arabian mare is just so much better accepted. After learning appropriate ABCs, some models are just riddled with flaws and other problems that either take too much effort to fix or can be better done with a different mold.


Practical Advice


Nothing can replace practice and trial and error. Time and effort are the true shapers of talent. This includes familiarizing yourself with your materials and tools, and doing what works best for you. Learn techniques from whoever will teach. Expand your horizons and try different epoxies, paints, and tools. Figure out what you like to work with and your customs will show it. That said, give each technique and materiel a chance: no one became an expert immediately.

That is the one thing to remember: no one started off being perfect or mind-blowingly amazing. Don't let the object of perfection intimidate or frustrate you as it did me. I took a 4 year break from touching anything because I just felt I couldn't get my customs smooth or correct enough. While one should strive for smooth, clean, correct pieces, keep in mind that live horses themselves sometimes have random bumps, divots, and white or black specks/hairs on them.


My first finished piece in years

Also, no one will look at your model as closely and as intimately as you have. You've seen this custom naked! The judge spends, on average, about 10-30 seconds looking at your model. That is just enough time to get the idea and check out anything particularly eye-catching, but not enough to see if you left a nubbly of paint goop in the off-side armpit. The overall impression of your model is what they are truly seeing. Make sure that what they see is how you see it as a glance, as an accomplishment to be proud of, and not as you see it under a magnifying glass where you see things that just aren't there anymore because you covered it with epoxy and paint 6 months ago.


Your Audience and Vision


One of the cardinal rules of art is to create what you want, not what someone else wants. For those who plan to sell their customs, this puts one in a bit of a dilemma. Maybe you'd like to make a horse in that awkward, downward stage of gallop, and you may even have a picture of a horse doing it. But it looks funny and doesn't show the horse in a graceful state. Same thing goes for funky hair, or maybe a funny curled lip. Being able to do any of these in a interesting and beautiful way is hard, especially in a 3-D environment.

A lot of this has to do with the previously mentioned practice and learning of new techniques. Being able to eye something and see if it looks pleasing to the eye as well as correct takes time and gut instinct. This is the talent that so many artists strive for, and not just model horse artists either. Flow, balance, and use of color or texture is something anyone in any art class will learn about, but it's actual application that separates the great artists from the good.

Crazy idea, fun result!


Coming up with creative ideas is something some people are just prone to do and can't be taught. But that's where learning all you can comes into play. The craziest idea can turn into the coolest custom just because you thought of it because you just happen to see it. One can start making connections that most just don't think about. Yeah, everyone's done a Peter Stone Standing Arabian into a National Show Horse or American Saddlebred, but how many people look at Weather Girl and think "Sliding Reiner?"

There comes a time when purposely putting flaws on a model (such as cow hocks, or a droopy lip, or even a superficial scar) is endearing and gives the piece character (because it truly reminds them of a real horse), but might not show well because, in real life, this would be a flaw. Niche buyers may gobble this up, or perhaps even certain judges will look past it and award it anyway "because it's cute." This is a risky move, but fun to do sometimes.

Slightly uneven legs in a jumper adds character and realism.


In short, most buyers are very well educated and know what looks right and wrong. Some have strong preferences for a particular breed, pose, discipline, etc. They LOVE something new, unique,or exciting. Don't try too hard though and I wouldn't suggest making several versions of the same thing. As I said, they like something unique. Whenever someone asks me to make a "copy" of something I've done before, I refuse.


Conclusion


That's all for now, as long as this post ended up being, I feel as if I could still go on about this topic. There has been lots of  drama, controversy, and opinions about what make a good custom, and it's so easy to see customs get ripped on. People need to understand that all artists start somewhere, and a lot of this I figured out for myself or had to learn from others. I highly suggest anyone to go to the workshops at Breyerfest, purchase how-to videos from various artists, join online forums like Model Horse Blab, or go to any local shows to see what's showing. Ask opinions, process them, but form your *own* opinion. Follow common sense and ABCs. And after you've learned a lot, don't be afraid to teach others. Without mutual education among our hobbyists, we'd all be in the dark ages.


Friends in the hobby are a great thing!

Wednesday, May 02, 2012

Making Us Proud at Breyerfest


As we come closer and closer to that wonderful weekend in late July, I now turn towards an opinion that has increasingly come to my attention while working at the Kentucky Horse Park.

Model Horse People are crazy.


Why the Reputation?


Now granted, it's a few against the whole making most of us look bad, and it's certainly not the opinion of every Park employee, but rather a slight unease some have when they realize Breyerfest is upon them. In our excitement of making our yearly pilgrimage to the Mecca of all things equine, some seeing real horses only at this time of year and never again, we come off as nothing more than overgrown 5-year-old little girls to the Park staff. Even worse I discovered, special measures are put in place to prevent... stealing.

That's right, not only do some embarrass themselves by being ignorant or forgetting proper horse etiquette as they run up to a horse, squealing in excited chatter that would make anyone recoil in fear, but the nameplates on the stall doors in the Hall of Champions are taken down prior to Friday morning so that they'll still have them by Monday. No tack is left unattended. Even golf carts are locked down! And even more recently, I fear for the Breyer display stall in the new Kid's Barn (where I usually work). No doubt some of the models there will end up "walking away."

My purpose here is not to be disgusted, or to bash my fellow hobbyists, but to educate and ask to remember some cardinal rules that will perhaps change the opinion of those who live and work at the Kentucky Horse Park and even of our fellow hobbyists. I'm going to give some basic guidelines, some may sound incredibly simple and obvious, especially to those who have or deal with horses on a regular basis, but I understand some may never have realized these rules, either through inexperience or unintended ignorance.


The Line... Yes, THAT Line


This has been a point of controversy and ill feelings for many years, but the line that develops at the entrance to Breyerfest on the Friday (and Saturday to an extent) morning is extremely crowded and filled with excited anticipation and various forms of plotting. With Breyerfest so close we can taste it, and a Black Friday-esque sale going on in the Breyer Store, as soon as the massive crowd is "released," it can border on the feeling of chaos

Aaaaand they're off! (Remember to walk *calmly* and not rush: Breyerfest isn't going anywhere :P)
Remember, there are CHILDREN and ELDERY in this line. Do NOT push and shove, act inappropriately, instigate any conflicts, or otherwise make the situation worse than it is. Injuries have happened in the past and they really didn't have to happen. Please remain calm and TRY to act polite, even when in the Store for the Special Sale (also referred to in the past as the "Ninja Pit of Death.")

One of the things I find quite sad is that out of ALL events held at the Kentucky Horse Park, this is one of the only times its fine Mounted Police are in action and ready for duty for pedestrian control. When they do allow the line to move on towards the Covered Arena, STAY BEHIND THEM. You are not allowed to pass them and if you do, they will run down any offenders and send them to the very back of the line which tends to be in the middle of the parking lot. Don't give my cop buddies a hard time, listen to what they say and follow their directions. They are real badged officers with plenty of experience and can uphold the law and order in any way they see fit.


Also, I would like to offer this helpful tip and really want to encourage this: If you are not trying to get to the Breyer Store for their Special Sale (which as mentioned before, is not for the faint of heart), have a 9:30 Ticket for the Special Items, or want to see the Opening Ceremonies, I would suggest NOT showing up until later in the morning, after 9:30 or 10:00. The line truly is enormous (as is the traffic to get in) and takes a while to get through, and Breyerfest is going to be there all day. Just because it opens at 8, doesn't mean you HAVE to be there... unless you need to be for the above reasons.

The gates officially open at 8:00 AM (though I know people who line up MUCH earlier than that), with Opening Ceremonies at 9:30 AM which last about half an hour to 45 minutes, after which most exhibitions begin. Also remember that Parking will be $5 per day unless you have a season pass to the Park.


Bringing Your Dog to the Park


I did want to make one small blurb about Dogs at the Horse Park. I brought my own dog, Casey, in the past and he did well, though he wasn't a fan of other dogs or horses, so we kept that in mind as we progressed throughout the day. Keep in mind while there is special screening processes in place to make sure horses don't have any communicable diseases, there is no such requirements for dogs. To bring your dog is to possibly expose him to other dogs who may have something he can catch. Prevent him from interacting with other dogs.

The Horse Park is used to doggy visitors and are generally allowed just about anywhere (including the Visitor's center) except the Museum and Restaurant. You may use the Visitor's Center as an air-conditioned place to get your dog out of the heat, but only for short periods of time and please keep him away from the Auction Models and Artsian's Hall tables (ask the person at the front desk if it's ok, usually it is but with all the increased activity and traffic with Breyerfest in there, it may not be a good idea)


July in Kentucky is HOT! Be aware of your dog's cooling needs (certain breeds, thick coated, overweight, or elderly dogs may need more attention) Keep your dog in the shade, avoid walking on pavement, and bring a bowl or collapsible container for him to drink water out of. There are many water sources on the park in the form of water fountains and wash racks. Feel free to use them to fill water or even hose your dog down (please ask a nearby Park employee if you may do this). Please do not use wash racks if there's a horse using it already, and remember to shut off the water and leave any hose you used as you found it. Do NOT let your dog jump into any water tanks.

A few other tips:
  • Be prepared to take your dog back to the car to hang out in shade and AC if he needs. Take many breaks and plan on not being out for long periods of time. If at all possible, consider not bringing him to the Park/Breyerfest at all.
  • It's also a good idea to assign one of your group or family members to pay specific attention to his needs. That way only one person needs to worry about him, and knows exactly when he needs his scheduled needs like water, food, or potty breaks. 
  • Please pick up any poopies they your puppy may make, lots of people walk on the grass!
  • Do not let your dog interact with any other dog and keep him away from the horses as well. This help prevent any conflicts, injury, and spread of disease.
  • And, of course, keep your dog on a leash at ALL times! This is in accordance with the Law and Park policies. Any dog found off of a leash may be fined, or worse, gathered and sent to a local humane society and will demand a "bond" to be paid, if you even realize he's there.

The (Live!) Horses at the Park

Lykle the Friesian greets Breyerfesters

Most of the Park's horses are well trained to deal with the inexperienced and most have seen it all. Most will be just fine with flash photography, petting, and other things that may upset the average horse. However, any guest horses for Breyerfest or competition horses there for a show that happens to be using the Park grounds at the same time may not be.

It is advised NOT to bother any competition horses, both for their own benefit and to reduce the risk of spread of disease. Every horse that sets foot on the park must bring with them papers to show they are healthy, but it's entirely possible that this is not fail-proof. Also, these horses are riders are in a high-stress environment and in a certain mind-set that must not be interrupted.


It's not uncommon for there be a hunter/jumper show going on during Breyrfest.


UPDATE: A special note from someone who has connections to a show that will be going on during Breyerfest this year:
This year NAJYRC (North American Junior and Young Rider Championships) is at the KHP the same weekend as Breyerfest.


These horses are NOT there for Breyerfest and are high strung athletes. The owners are very touchy about their horses at this event as it is the "Olympics" per say for American and Canadian young riders in all three Olympic disciplines. All of these horses WILL be drug tested and trotted up in front of an international panel of vets, so even petting them could cause a healthy horse to drug test positive (traces of Neosporin and other antibiotic ointments show positive sometimes). So please, do not walk through these barns and ask to pet these horses.


On the note of competition, don't stand close to the rails at the warm-up. Having people crowding the warm-up area is distracting to both the horse and the rider.


It's also frowned upon, and sometimes illegal, to cheer before a rider has completed a jumping course or dressage test. If you chose to watch Cross country, don't cheer until the horse has completed the combination or jump it is being presented to. Sometimes riders can get disqualified for premature cheering as it can sometimes be seen as "coaching."


Rules to Live By (Maybe Literally...)

The most important thing to remember is that horse are living, breathing, PREY animals. They are not dogs or cats and should not be treated or approached like one. As one article put it: "WE (people) are like dogs or cats. We are predators. Predators like to do new things. Horses do not like new things, as new things usually mean the death of them." Learn the safety rules and proper conduct when in the presence of the real thing.
Now is not a good time: The horse is agitated and defiant.
  • Ask whoever is handling/riding a horse if you may approach. It may not be a good time to come visit if the horse is being restless, scared, preparing for a presentation, or being worked on with grooming, hoof trimming, or saddling/tacking up.
  • Always walk calmly, not run, up to a horse. Running up to a horse means you may be a predator and he may try to defend himself.
  • Always approach a horse from the front or slightly from the side, never from behind. Be sure to always be in view of his eyeballs so he's not surprised by someone popping into his vision. This goes double for horses wearing blinkers/blinders in harness, like the draft horses pulling the trolley.
    +Horses cannot see directly behind them or in a small blind spot directly in front of their face. Be aware of this if you reach a hand up to pet them.
  • Watch a horse's body language. Ears, neck position, and tail all tell how the horse feels about your being in his space.
    +Pricked ears, ears to the side, or slightly back are fine.
    +Ears pinned back against his neck is not.
    +Stiffening of the neck, raising his head out of reach, or avoiding you altogether means you should take the hint and leave him be for a minute.
    +Eyes wide ( I would say "with eye-whites showing" but some horses, like Appaloosas and pintos, have eye-white that shows no matter what, so just be aware) Half-closed eyes means the horse is very relaxed or might even be dozing. Leaving a sleeping horse lie is also a good idea, as it's only polite.
    +A swishing tail (when not swatting at flies) is also a bad sign.
  • Good places to pet a horse is on the nose, face, forehead, and neck. Avoid the ears and eyes as some horses are sensitive about them. Make sure he sees your hand before you reach up between his eyes (a blind spot) or he may be surprised.
Petting done right, such a happy, relaxed horse!
  • Never walk behind a horse. If you need to, try to stay back at least 10 feet and TALK to them. Say whatever you want, just make a little noise so they can listen for you. Another way of going behind a horse is to keep your body close and keep a hand on his rump and you go behind. The idea behind this is instead of gaining some steam for a kick, the horse can only (roughly) "nudge" you away. This is NOT recommended for those not use to horses and is to be avoided if at all possible.
  • Watch your feet. Make sure that your feet are one full, adult-sized step away from the horse's base. Horses like to shift weight or move restlessly, so be prepared and watch to see if a horse is planning to take a step so your feet aren't under them. ESPECIALLY if you are wearing sandels or flip-flops.
  • DO NOT HAND FEED THE HORSES. This is a Park rule to insure that the horses don't start getting nippy whenever hands are put near their mouth. These horses are usually well trained to be petted on the face and nose, and it's ok to do so. But if they expect hands to have food, a hand may become food. Save your fingers and keep your apples, carrots, and peppermints to yourself.
    +In fact, don't feed the horses AT ALL. Horses have much different digestive systems from ours. They cannot burp or throw up, so if something disagrees with them, they can colic, which is very serious and may even cause death.
  • Keep an eye on your children and dogs. Just because you know what to do doesn't mean they will, even if they don't mean to cause harm. Some dogs are threatened by horses. Some children think all animals are big fluffy stuffed animals that wouldn't dare hurt them. So watch your child or dog to make sure they don't go darting in a horse's path or worse. Serious injury or death is a big possibility.
Nick and Lou, the Clydesdales. Also, remember to say "Hi" to my buddy Harold the Tour Guide!

  • The Horse-Drawn Tour Trolley does not stop. If you see it coming, get out of the way or risk getting run over. If you are riding the trolley and one of your items falls off, again, the trolley does not stop. It's unsafe to stop or jump off anywhere on the trolley route, especially on a hill, as it puts strain on the horses and risks injury to you. (Note: the Trolley Tour is not available to Breyerfest attendees unless you pay for a Park admission ticket, due to the sheer load of people they would have to haul if it was open to all Breyerfest ticket holders.)
  • And this really goes without saying but it has happened: Do NOT open and/or enter any stall or paddock, either by the gate or hopping over the fence. Only Park employees are allowed to do this for obvious safety reasons. They are experienced horse people and trained professionals. I don't care if you "have horses yourself," it is incredibly inappropriate and unsafe.


Stealing is Wrong and Makes Baby Ponies Cry

As for the theft, there's nothing I can say here that will deter those who steal from doing such things. I can only remind that the Kentucky Horse Park is a state park (owned by the Commonwealth of Kentucky) that relies heavily on donation and a small amount of funding. Anytime something is stolen from the Park, it's the horses themselves that takes a hit.


The Cuteness! Its... so... FUZZY!

Kentucky State Taxes do not support the horses' feed, equipment, and other needs. That is funding through the Kentucky Horse Park Foundation (previously the Man O' War Foundation). And like most funding sources, the money is hardly ever-flowing. It's not uncommon for Park staff to pay for things they need with their own money, and as state employees, they don't get paid much.

I would like to make a note here; anyone can make a donation at any time, please ask in the Visitor's Center if this is something you would like to do so the Park can keep on running!
The Kentucky Horse Park wins at "model horses" in their life-size bronze statues.
(Reminder: Please refrain from climbing on or sitting on the statues. They are works of art, not playground equipment)

Breyer is responsible, however, for the models in their stall in the Kid's Barn. However, those models are there to teach, inspire, and spread the love of model horses to the next generation. Even though Breyerfest is packed, with hobbyists, without sparking the fire in the children that discover the hobby and what it has to offer in the first place, we risk the future of our hobby.

Not saying a missing model or two will do this, but who knows if it was that model that a child really connected with and wanted to learn more. Plus, hard to have a Breyer stall without Breyers. Don't ruin their fun, don't pick up or take any models from the Kid's Barn.

All in all, we are VERY lucky that the prestigious Kentucky Horse Park agrees to host Breyerfest, without them, I don't Breyerfest could exist, or in the very least, could not be the same at all. Please respect our host and don't do anything to make them think twice about allowing our event to happen.


In Conclusion (AKA the Real Message):

I hope this year we can show those "real horse people" that we do indeed have some restraint and composure, that the only "crazy" thing about us is our quirky, fun-loving personalities and prices we pay for "just a plastic horse." It's because of the hobby that I owe much of my knowledge, understanding, and love of real horses, and it's helped me get a job I love, so I want to make sure that everyone can help us prove that we are serious horse lovers who strive for knowledge and beauty and not reckless children who never grew up.

Most importantly, the "real" horse people don't understand the hobby in general. How can you have a connection to these inanimate objects? Why pay prices that could be better spent on a new saddle or even a whole new, well-trained horse!? Why choose to clutter our houses with plastic when we could be out riding? For some hobbyists, we don't have these options, either due to finances, living arrangements, or physical abilities. For some, it's a personal choice to love horses from afar but with no desire to actually work with them hands on.

Even in freezing temperatues, horses gotta eat!

Ironically, it's our enthusiasm, and general "excited" behavior around the horse people makes them discredit us. We look like such newbs! Real-horse-owning hobbyists aside, we may be book smart about the equine, but do we actually know what we're talking about? Can we conduct ourselves correctly and even expertly in the presence of the pros? We lack the true, hands on experience in their eyes, and perhaps even the true dedication that's in their hearts. Not everyone would be willing to wake up at 5 A.M., get absolutely filthy, get their clothes soaked with sweat, or chip ice from water troughs just for a large hairy beast. But true horse people do, so really it's exchanging one brand of crazy for another. I, myself, dip a toe in both of these insanity pools.

I have felt this general vibe myself as I straddle the two worlds. But, the further I prove myself in one, it actually helps solidify and strengthen my connection to the other. I feel I have a very good understanding of what's expected from each group and by following the guidlines and tips I have written here, it will help better our image as a whole and make prime examples of why our hobby is so great!

Melanie Miller works diligently in the Artisian's Gallery

PLEASE share this post with all your friends planning to go to Breyerfest. I would love for everyone to be aware and showcase themselves as a wonderful representative of our hobby. That out love for horses goes beyond handling and collecting equine-shaped-objects, but to truly understanding the beautiful animals we all fell in love with as kids.

Have fun and I hope to meet some of you at Breyerfest this year!!!

Sunday, April 15, 2012

Validation

Long time since the last Blog, Life got (as it does) BUSY! The models are taking a back seat on the schedule while I get accustomed to my new job at the Kentucky Horse Park. No need to be jealous, I know what I have and I am SO happy for the opportunity and love every day! Anyway, on to today's topic...

As I straddle between two worlds these days (both Live and Model Horses) I've begun to observe "Real" Horsemen and Women have a kind of disdain towards the hobby. They laugh at it, thinking it's silly to be still "playing with toys." No doubt the hobby image is marred by the small group within it who are indeed still little girls in their thinking and behavior. And let's face it: we are, on a whole, quite the quirky bunch, of which I wouldn't trade for the world. It's not until I show them the numbers (prices I've gotten for pieces, the amount of people following on FB Page) that they consider taking it seriously, and even then, they marvel at how people can "waste" their money and time.


I want to make one solid point: The Model Horse Hobby is what has made me the (real) horsewoman I am today.

The hobby has opened my world, my way of thinking, sated my thirst for knowledge in all things equine, and is responsible for teaching me on so many levels. It started with custoimizing the Breyers. I would do portraits of famous horses. But I began to realize I wasn't doing them justice. I found my skills, both in sculpting and painting, needed serious work.


Practice aside, having good reference materiel seemed logical. So I researched for hours on my computer, googling images for ideas I had, eventually opening doors to other disciplines, birthed my interest in color and it's genetics. That in turn encouraged me to perfect my eye for breeds, their standards, their flaws, their uses. Yes, it was all self-taught book smarts, so I saught advice from those who knew first-hand more than I. With my files and folders growing (currently at around 20 GBs), I studied photos, videos, blogs, books, the horses at the barn I hung out at, taking lessons in exhange for cleaning their stalls. All in the grand effort to understand the animal I held so dear.


Every day is still a learning challenge. As I've ventured out in the world and rubbed elbows with some of the best, the quest continues. I feel I have a solid general overview on which to build and it has no doubt help me get my foot in the door. In fact, it's what has landed me my latest job... impressed by my knowledge and affinity for sharing it with people, I was one of the lucky few to get a position as a seasonal in the Kid's Barn. To say I absolutely love it is an understatement.

So they can laugh, they can cringe, they can think what they want. My knowledge will continue to expand, my experiences will take me places one can only dream of. Granted, knowledge alone isn't enough, hands-on is the true teacher, and I've had my share of that as well, despite my financial and geographical status growing up.

"Figuring out" a horse can both be done, and yet, impossible. Horses are the ultimate teachers, and with each being an individual with their own personality, quirks, preferences, abilities, and heart, one can never truly stop learning. And there's nothing quite like bonding, communicating, and achieving with someone who doesn't speak the same language originally. Trust and friendship must be earned, never given outright. With so impartial a judge as the horse, I think that's part of the attraction for a lot of horsepeople. A horse sees the truth, and rewards us accordingly.

Sunday, March 11, 2012

Priceless

Money is a big part of the game in our hobby. One must purchase *something* in order to do anything at all, whether it' collecting, crafting, or showing. It's also a bit of a hot topic, being the root of several dramas, from squabbles amongst jealous showers and "overpriced" artists to controversy among the major producing companies. Some feel it's bad form to even speak about. But the truth is, we're all just trying to make a living. The fine line between necessity and greed can be a hazy one, and everyone has their opinion of what it is.


Whenever someone asks me how much my customs are, I can't give a definite answer. My commissions are estimated based off of the work done to them (which includes levels of dificulty, how much was resculpted, time estimated to be spent on the piece etc.) Sales pieces are sold via offers, so they are worth whatever someone is willing to pay, as it is with any piece of art, and are thus a purely indiviual basis.

This can be effected by how much the idea speaks to a prospective buyer (want), how that person or market is doing in general (funds available), and who else is trying to bid on the same piece (competition). One can also argue what's considered correct and considered more likely to win/catch the eye in the ring (popularity) or the popularity of the artist's work is also a factor (name). So you can see it's so hard to guage what something is worth because of this... where do you even start?

For example: I have completed two CM Weather Girls with roughly the same amount of work done to them. One went almost double what the other one brought in. I have no idea why this is. One was repositioned into a dynamic sliding stop, a performance shower's dream that would stand out amongst the stock horses. The other was (in my opinion) a beautifully wild romping horse at liberty that truly captured the spirit of the Arabian.

Can you tell which is the more expensive custom?


Also, I don't normally reveal the final prices of my sold customs because I don't want it to be seen as bragging or use it as an example of "status." So many artists out there have been target of judgement, bitterness, or just plain rude behavior and snarky comments because of what they charge or how the treat this very subject.

I can't even begin to fathom how to make a price list. Some go by saying something like "$50 for moving a leg." Does a leg move mean just a "heat and bend" job? What if you need to resculpt some of it? Usually if you move a leg, it affects more muscles than the average person would think. Some require you resculpt muscles on an entire leg, all the way up the haunch! Is it still $50 then? How much more do you charge?


On the other hand, if you do say you will come up with an estimate, people begin to wonder if you're just asking to be paid whatever you want. How does an artist come up with a number? Too much and they're full of themself. Too little and they aren't getting what they deserve. It goes in such big circles and back n' forths, it makes one's head hurt! This is why, for sales pieces, I prefer to start with a price I wouldn't let it go for any less, and let the buyers themselves decide the price. Sometimes I get lucky, others not as much.

This guy went WAY higher than I ever dreamed!


People also often ask me how much a model has sold for. In my opinion, I find it rude for me to tout what someone paid for one of my pieces. It's their money and their business. It's for that reason I never reveal who bought or now owns my pieces. The new owner is welcome to disclose all of that information, I just find it in poor taste to do so myself, lest they get ridiculed for paying too much, or worse, are the target of sore losers or get bombarded by people asking to buy the piece off of them.


It's for this reason that most in the hobby still has no idea who won the infamous "Victrix" (Ah, you thought I would write a post on pricing in the hobby and not mention HER?). "The Victrix" (I'm sure she has a real show name by now) was a Carol Williams Victrix resin ( a Thoroughbred-type mare) painted the most dazzling and painstakeningly detailed Appaloosa by talented Australian artist Liz Shaw (http://www.ticktockstudio.com/). She spent nearly over a year creating her. From her hair-by-hair coat to her liquid eyes, she almost breathes.

She also brought in over $17,000 in her auction. No, that is not a typo.


Within a week, she became the most expensive model horse ever purchased in hobby history. Understandingly, her owner remained anonymous. Although the auction also donated half of it's proceeds to cancer charity, even if you cut her price in half she's still the most expensive model ever sold (ok, probably in the top 10). Many people have given the general opinion that it is an insane price, even though it is truly an amazing model with very few equals. It's not uncommon for someone to have spent a lot of money be given a lot of flak for it. A lot of people immediately went to the comparison that that kind of money could have been used for something like a real horse or car, for example.


Now I've thoroughly rambled on about several aspects on the subject, all of it in an effort to explain my price policies (and alternatively, why I don't reveal my prices.) What it comes down to is: A piece is only worth as much as a person is willing to pay for it. It's folly to try and guess what someone will pay and set a price. You're either going to sit on it for a long time or it gets snapped up so quick you begin to wonder if you set the bar too low. And when one's entire income and ability to pay rent next month is based on the next sale, they deserve to get what they can out of it in a timely manner. There are several options to do this, and this is what works best for me.

Friday, March 09, 2012

"How Do You DO This?!"

People have asked me quite often how I do certain things to achieve the results that I do. I figured it was a good opportunity to do a post about my process to shed some light on those who both are interested in my skills or who wish to try their own projects.

Now, this isn't going to be a complete how-to on how I do everything it is what I do (tutorials may come later for specific techniques) but this is just a general and semi-quick overview on how *I* work. Every artist has their own styles, tools, materiels, and motivations they use. And as they should! Not everyone's way is perfect for everyone. One must learn and discover what they feel most comfortable with. I've never trusted myself with an airbrush and I just plain don't like oils. And yet others in the hobby are positively *goddesses* with them. It just depends on what is best for the individual and their own trial and errors as they learn to master it.
For this post, I'll use an example piece to follow. In this case, I'll be using the Breyer Bluegrass Bandit mold (BGB, more specifically, Elvis's Bear).
Usually my process starts with looking at a model and trying to figure out what I *could* do with it. Some artists say the "horse speaks to them." I study it, holding it while watching TV, sitting it on my computer desk, looking over the muscles and lines, seeing what it could be (relatively) easy to turn into. Other times, I have an idea and I try to find a model that best suits to the idea. It all just depends on each situation.
Once I have my idea, it's time to look for a reference picture. Even if you have a specific idea in mind and can see clearly what you want, it's best to have a reference photo to help "back up" your idea in case anyone questions the model later (and usually, there will be).
In my case, I saw BGB as a Standarbred Pacer. Keep in mind this was NOT my intention when I first picked him up. Actually, I was staring at him to determine if I could use him to make into a trail mule for a commission. But like most ideas I get, something totally random just popped out at me! Thankfully, I had LOTS of photos from my trip to The Red Mile, a well known racetrack in downtown Lexington that hosts mostly harness racing meets.
Now that I have my reference photo for the pose, I got to work. I usually start by heating, bending and cutting with the help of a heat gun. In my case, I like the temperature and precision of my embossing tool, something you usually see in the scrapboook section at Arts & Crafts stores. I have, in the past, use a paint stripper found in most hardware stores (with 500 degrees Farenheit and 1000 degrees Farenheit settings) but have since found it heats up the plastic too quickly and causes it to scorch and bubble.
He looks a tad mad, doesn't he?


Sometimes things need to be reshaped and sanded. For that I use my trusty Dremel. I used to use a battery powered one, but even with multiple batteries and switching them out, I lost power often, sometimes as often as within 2 minutes of starting work! So investing in a good, plug-in model is my reccomendation so one can enjoy hours of destruction and fun!
After making all the moves and reshaping, there's nothing left to do but start building back up! For this I use my preferred artists's epoxy, Magic Sculpt. I have used Magic Sculpt for years since I first started back in 2001. I like it for it's nice smooth grain-free texture, clay-like workability. It binds to almost anything, blends like a dream, and smooths with just water.

As a two-part epoxy, it begins to cure chemically as soon as the two parts meet. Thankfully, it has a nice work time, getting progressively firmer with every hour. I can usually work with it well for up to 2-3 hours, taking advantage of it's firmness to add in some detail that would normally cut through it too harshly when it was more wet. It gets to be hard enough to handle within about 6 hours, hard enough to start some carving and sanding in 12 hours, and ready for anything in 18-24 (I like to give it a full 24 hours before I do anything major because before that point, it is still is fairly "soft" even though it's hard).
After sculpting muscles and reshaping and sanding with the Dremel and 340 grit sandpaper, I may do a few more stages of "epoxy runs" or whatever else I may catch. Then I primer and prep for paint.
I am not known for my painting skills, but I do try my best to do my models justice. My usual plan of attack is to do think, watered down layers of Liquitex Acrylic paint. Acrylic is great to use as it has little or no odor, thins with straight water, and drys quickly. I try to gently rub/paint each layer on and I seal with Testor's Dullcote between wach layer so as to not accidently scrape away the previous layer, and to also give the next layer some tooth. My base layer is much, much lighter than my goal color for the model, and I do this for a reason...
Once I am done with the base layer, I then use Earth Pigments and/or chalk pastels to do all my shading. Jaime Baker (http://www.jbakercustoms.com/) is a great teacher for this medium and I heartily encourage anyone who wants to know more to seek out her books, DVDs and tutorial CDs. Essentially, I put on the color like one would apply make-up: dusting and rubbing in the color .
This is also a layer stage, sealing with Testor's Dullcote between every layer so that the color can keep on gripping and building up. You will need another set of brushes, several in the same size, so that you don't mix colors. Also, it's impossible to clean Earth Pigments and pastels from brushes, and they will be destroyed fairly often, so feel free to use cheaper brushes.
For detailing, it's back to handpainted acrylics. Eyes, hooves and on occasion mane detail (especially for chestnuts). Seal with Testor's Dullcote and gloss the eyes and hooves with normal clear gloss nailpolish (you may need a smaller liner brush for small eyes) and boom, done!


Whew! It's a long process from start to end, it can take anywhere from a month to a year. But the results can be very rewarding.

The only thing left is selling your creation. Being able to distance yourself from your work is the first step, and it can be hard at times. There are several ways to sell. One can use eBay, Model Horse Sales Pages, Model Horse Exchange, Yahoo Groups, or create lotteries, offers, silent auctions, etc. from your Facebook Page or Website. My preferred method is to use Model Horse Sales Pages and do an auction-style Offers system, setting an end date for offers. I find this is most fair, reaches a wide audience, avoid eBay (which some buyers and sellers alike hate), and makes it easier for me to offer time payment plans.

Thank you for reading and I hope this was helpful to anyone curious about customizing!